Burning text on video
Intro
Often, it is required to show a certain set of data values on the video, some only at the start, others during the entire video. A good example of such a value that usually needs to be on there, is the distance that the crawler is at.
Traditionally, this is performed by the camera or video-capture card at the time of recording. With CAM-I however, you also have the option to add this text to the video after it has been recorded. Besides the option to correct some mistakes in the text, it also adds the benefit of being able to put more information on the video and have a uniform look and content across all your hardware equipment.
What
CAM-I makes a distinction between 2 different data sets that can be added to the video. Either one, both or none can be burned on the video. If a burn process takes place, so at least one of the data sets is added to the video, than the title will also be included.
Inspection summary
This data set includes information like where the inspection occurred, who did the inspection and for whom, what size the inspected sewer or waterway is and the material out of which it is constructed.
This information is only shown for the first 10 seconds of the video, after this period, it is removed so that the video is better visible.
Tractor data
A second set of data that can be shown on the video is the data from the tractor itself. This currently includes the distance that it traveled, the timestamp of the video, roll & pitch of the crawler, pan & tilt of the camera. This information is always shown throughout the length of the video.
different types of burning
When you add the text overlay to the video after recording, you have an option of 2 different types of burning:
- fast: this uses the subtext system available in mp4 to add the text. This method doesn't actually change the video itself but instead adds an extra track to the video file which makes it super fast. The only disadvantage: not all video players will show the text and they wont always show it in the correct size and position. More specifically, the default player in windows nor chrome support this feature correctly. VLC however does work properly.
- slow: in this mode, the pixels of the video images will be modified in order to add the text to it. In other words, this achieves the same result as burning the text on the video while recording. Because all the images in the video need to be modified, this process takes a lot longer. Thankfully, if you have a cloud version, this process can be taken over by the cloud.
configuration
video title
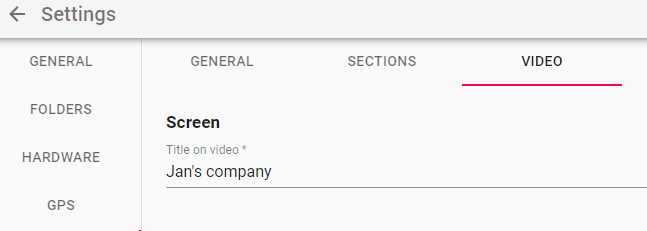
The video title can be configured on the reports tab of the settings page. Inside the reports config, select the video tab. There is an input field for 'Title on video'.
data selection
You can specify which data needs to be put on the video, in 2 different locations:
- in the config settings: from the settings page, on the hardware tab, select the hardware that you want to configure and click on the pen to the right of the camera title. When expanded, there will be 2 checkboxes that allow you to select which data set to include. This setting will be the default for all new recordings.
- on the video stream: if you want to modify the settings for a specific strand, for example because you have imported the video, than use the context sensitive popup menu on the video player of cam-i. You can open this by clicking on the video with the right mouse button. There will be the same 2 checkboxes as on the config page, but now you will specify the settings only for the active video.
rendering
All the videos that were recorded in the project, will be prepared when the report is made for the project. The rendered videos can be found in a sub folder of the project folder called 'report'
local
When you open the project, in the upper right corner of the application, is an icon that will let you render the report locally. When you select this option, you can choose how the text will be added to the video:
- not
- fast
- slow
the cloud
When you upload the project to the cloud, the report will be rendered using the 'fast' mode in order to prepare the pdf and images, but only the original video files will be uploaded, not the ones that were generated. When a user selects to download the videos, they will be prepared on the fly, in the cloud. This way, you have best of both worlds: you have a fully generated report locally without taking too much time.